AutoCAD Architecture 2010: Key Features, Part 4
Welcome back to our continuing lessons on the new features of AutoCAD Architecture 2010. Let's continue to see some of the wall enhancements.
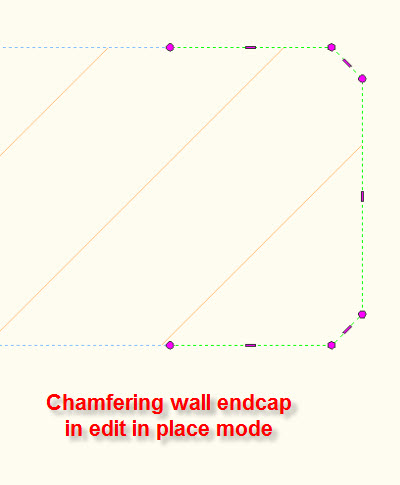
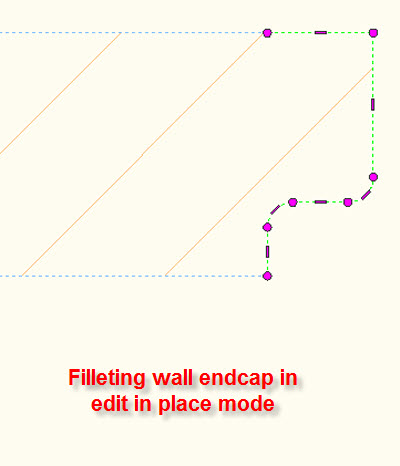
Editing wall endcaps in place
Now you can use fillet and chamfer commands at the command line while editing the end caps in place. Even though it looks like a very small enhancement, it is a terrific time saver.
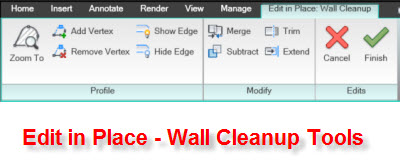
Note that the ribbon switches to the endcap editing related tools while you are in "edit in place" mode.

You can access lots of tools such as add vertex, remove vertex, hide/show edge, replace/remove endcap, fillet, chamfer, merge, subtract, trim, and extend. Once your editing is done, click the Finish button in the ribbon.
If you are editing the endcap of a wall style for the first time, once you click Finish in the ribbon, you will see a dialog box with two options, shown below.
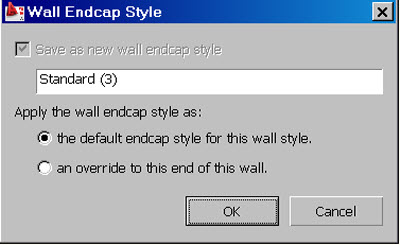
You can set the edited endcap as the default endcap style for the wall style or just apply the edited endcap as an override only to the end of the wall you are currently editing.
If you edit an existing endcap style in a wall style, upon clicking Finish, you will see a dialog box with two different options, shown below.
.jpg)
You can update the endcap style to reflect the changes you have made. All walls having the same endcap style will be updated to reflect the changes, or you can save the endcap as a new style with a different name.
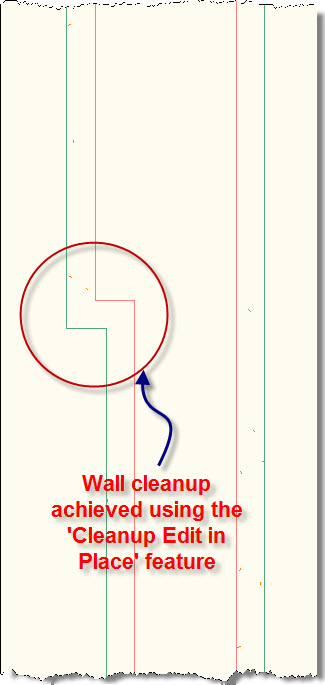
Cleanup Edit in Place
When automatic wall cleanup does not produce the desired results, you can use the Cleanup Edit in Place feature to change the shape, width, length, or depth of individual wall components at an intersection.
Below is an example of a cleanup issue, where two stud walls meet. The two stud walls have similar components but different widths.
.jpg)
We can correct this problem with the "Cleanup Edit in Place" feature. As you select the walls, the ribbon will give you lots of options related to walls. You can see the Cleanup edit in place tool under "Cleanup" in the panels.
.jpg)
As you select both the walls and click the Cleanup Edit in Place tool, the ribbon will reveal a whole new set of tools related to Edit Cleanup in Place.
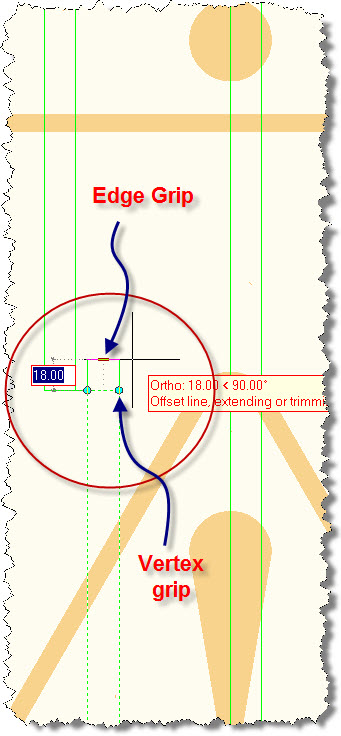
As you select the wall components, you will see two types of grips appearing: the vertex grips and the edge grips. I just selected the left GWB component of the stud wall having smaller width. Then I selected the edge grip and pulled it up for 18 mm (width of GWB) as shown in the figure below. As a warning dialog box appears, I clicked OK to accept it.
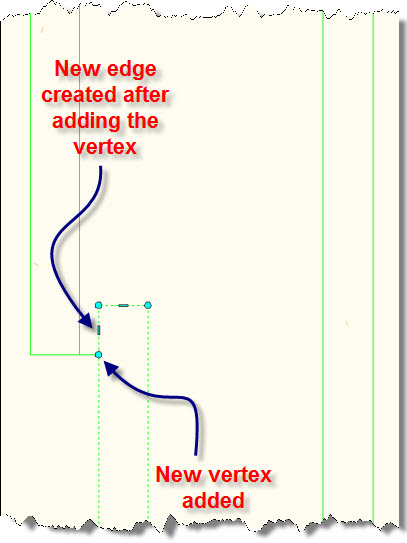
Now, we need an edge grip on the side so that we can pull the GWB component towards the left in order to align with the GWB component of the stud wall having the higher width. As we don't have an edge grip, we need to add an vertex, which will produce a new edge. You can find the Add vertex tool in the ribbon. Refer to the figure below.
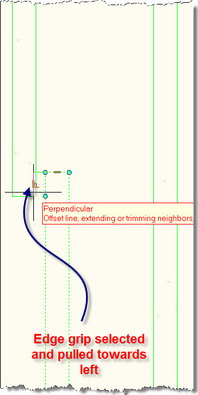
Now all we need to do is to pull the new edge and align it to the internal stud face of the wider stud wall.
 |
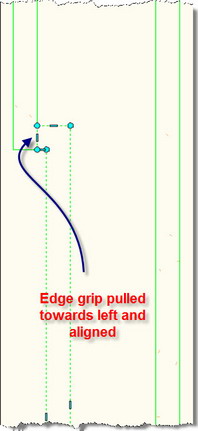 |
Once done, you can click the Finish button on the ribbon.
Next month, we'll continue our exploration of AutoCAD Architecture 2010.