AutoCAD Architecture 2010: Key Features, Part 2
In the last lesson, we learned that the ribbon can be minimized to the panels and then again to the tabs. Once you minimize the ribbon to the tab titles, simply click on the desired tab to reveal the panels and commands. Once you get back to the drawing area, the ribbon will minimize back to the tabs, giving you more working space.
In case you minimized the ribbon only to the panels, you will see both the tab and panel titles.
- Click the desired tab.
- Hover the mouse over the desired panel to access the commands.
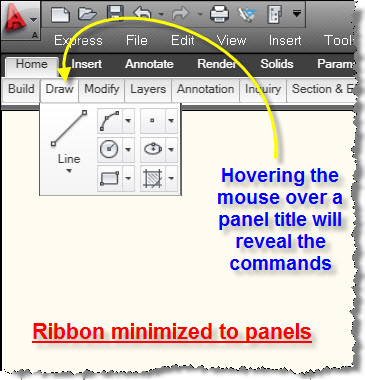
Once you get back to the drawing area, the ribbon will minimize back to the panel titles, giving you more working space.
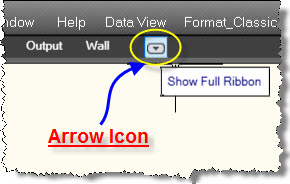
If you want to permanently display the full ribbon back from a minimized state, simply click the arrow icon again.
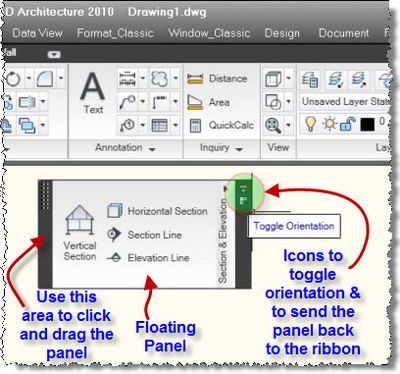
You can also tear off a frequently used panel and make it float in a convenient location. This way, the panel is available to you all the time, even if you switch to another tab. To do this, left click on the panel title and drag it to the drawing area. You can also drag the floating panel back to the ribbon in the same fashion.
As you refer to the figure below, you will see that the floating panel has two icons on the right side. One is for toggling the orientation of the panel and the other one is to send the panel back to the ribbon.
Now let's get a closer look at something that the context-sensitive, right-click menu has to offer. When I say "context sensitive," I mean that it matters where you right-click, as I will explain below.
When you right-click on the Panel Title
You get options to select the tabs and respective panels you want to display. You can remove the tabs you will not need for long. For example, when you are into 2D drafting, you can remove tabs such as solids, render, and so on to avoid clutter.
Below is a snapshot of available tabs and panels in my system.
 |
 |
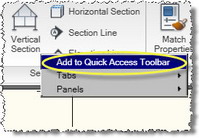
When you right click on a command in a panel
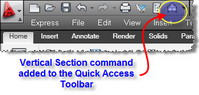
You will get an additional option called Add to Quick Access Toolbar. Selecting this option will add the command to the Quick Access Toolbar. Below is an example of adding the Vertical Section command to the Quick Access Toolbar. To remove the command from the toolbar, right-click on the icon (added command) in the Quick Access Toolbar and choose the Remove From Quick Access Toolbar option.
 |
 |
When you right click on the Tab Title area or any empty space in the ribbon other than panels
You will get a menu with more options. Refer to the figure below.
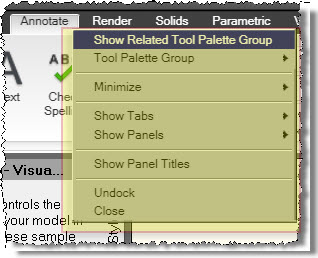
Tool Palette Group: You can associate a Tool Palette Group with each tab. For example, the Render tab can be associated with the Visualization Tool Palette Group. For some of the tabs, you can set this to "None."
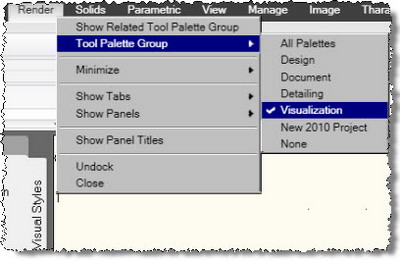
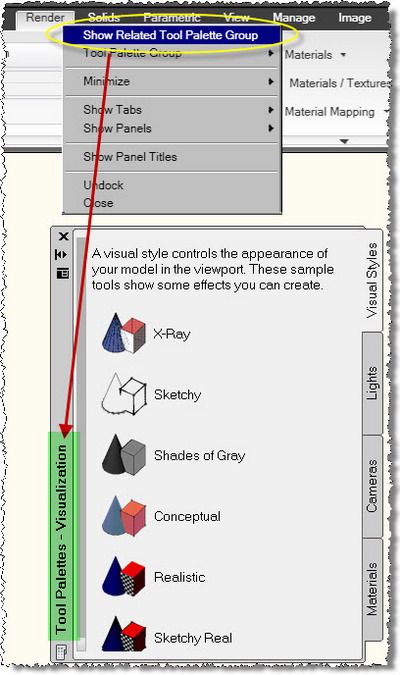
Once done, clicking the Show Related Tool Palette Group option will make the associated Tool Palette Group current. But before doing this, you need to make the tab active by clicking it. Referring to the image above, if you make the "render" tab active and then right-click and select the Show Related Tool Palette Group option, you can see that the Visualization Tool Palette is set current for you.
Show Panel Titles: This is a toggle switch for displaying/not displaying the Panel Titles. By default, the Panel titles are shown. To save a little bit of screen real estate, you can disable this.
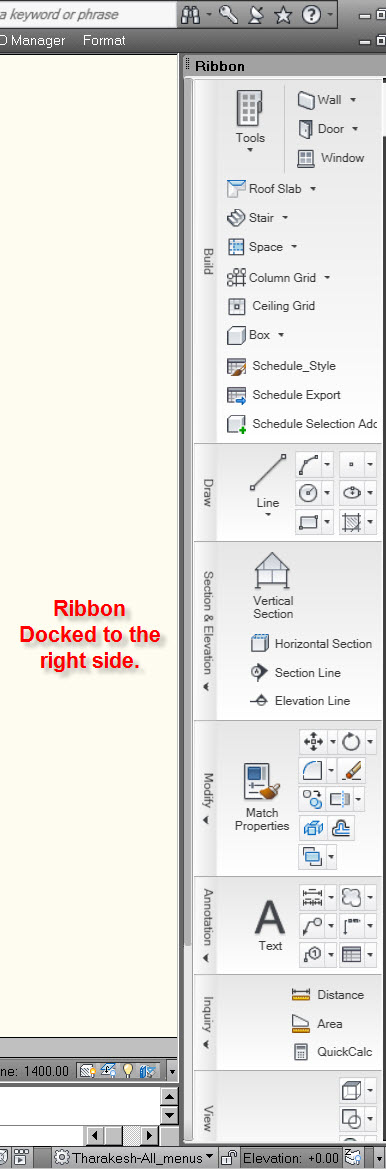
Undock: Clicking this option will undock the ribbon and make it float. You can reposition the ribbon at any convenient location. You can either make it float or dock it to the top, left, or right. You click on the header of the ribbon and drag around or dock it back to the top.
We will see more features in the next article. Until then, for the ardent AutoCAD aficionados, 'Ctrl+0' comes in handy.